Use segment
Commonly used target rules can be set up as segment, which can be shared between toggles.
We'll guide you to use FeatureProbe's platform to create a segment and then use the segment in two toggles. And through a back-end program, the modification of the segment will take effect in the two toggles at the same time.
Suppose we want to implement the following scenario:
- There is a whitelist of QAs emails that needs to be used in multiple toggles. so that QAs can test multiple toggles.
- This whitelist of QAs needs to be modified uniformly, and the new QA added can take effect in multiple toggles.
Create a segment on the platform
- Log in to the FeatureProbe demo platform. If you log in for the first time, please enter your email address. You can continue to use your email to access your data in the future.
- Click
Segments/+Segmentto create a new segment.

- Fill in the name and key, click
Create and publish.
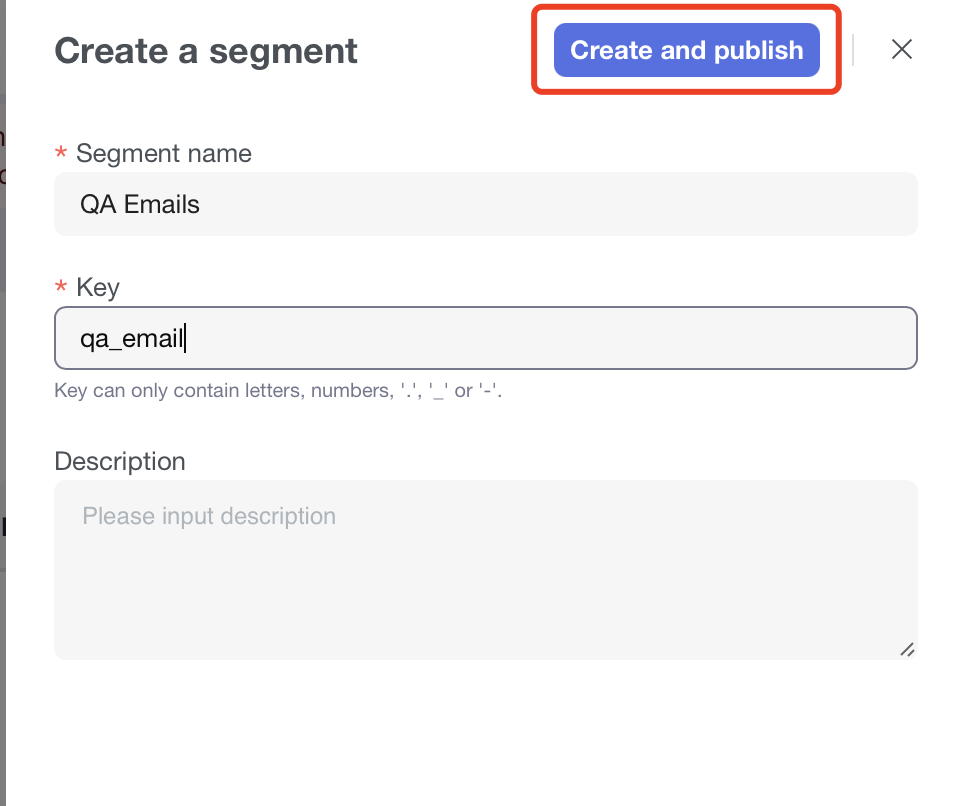
- Click the newly created segment from the list to enter editing.

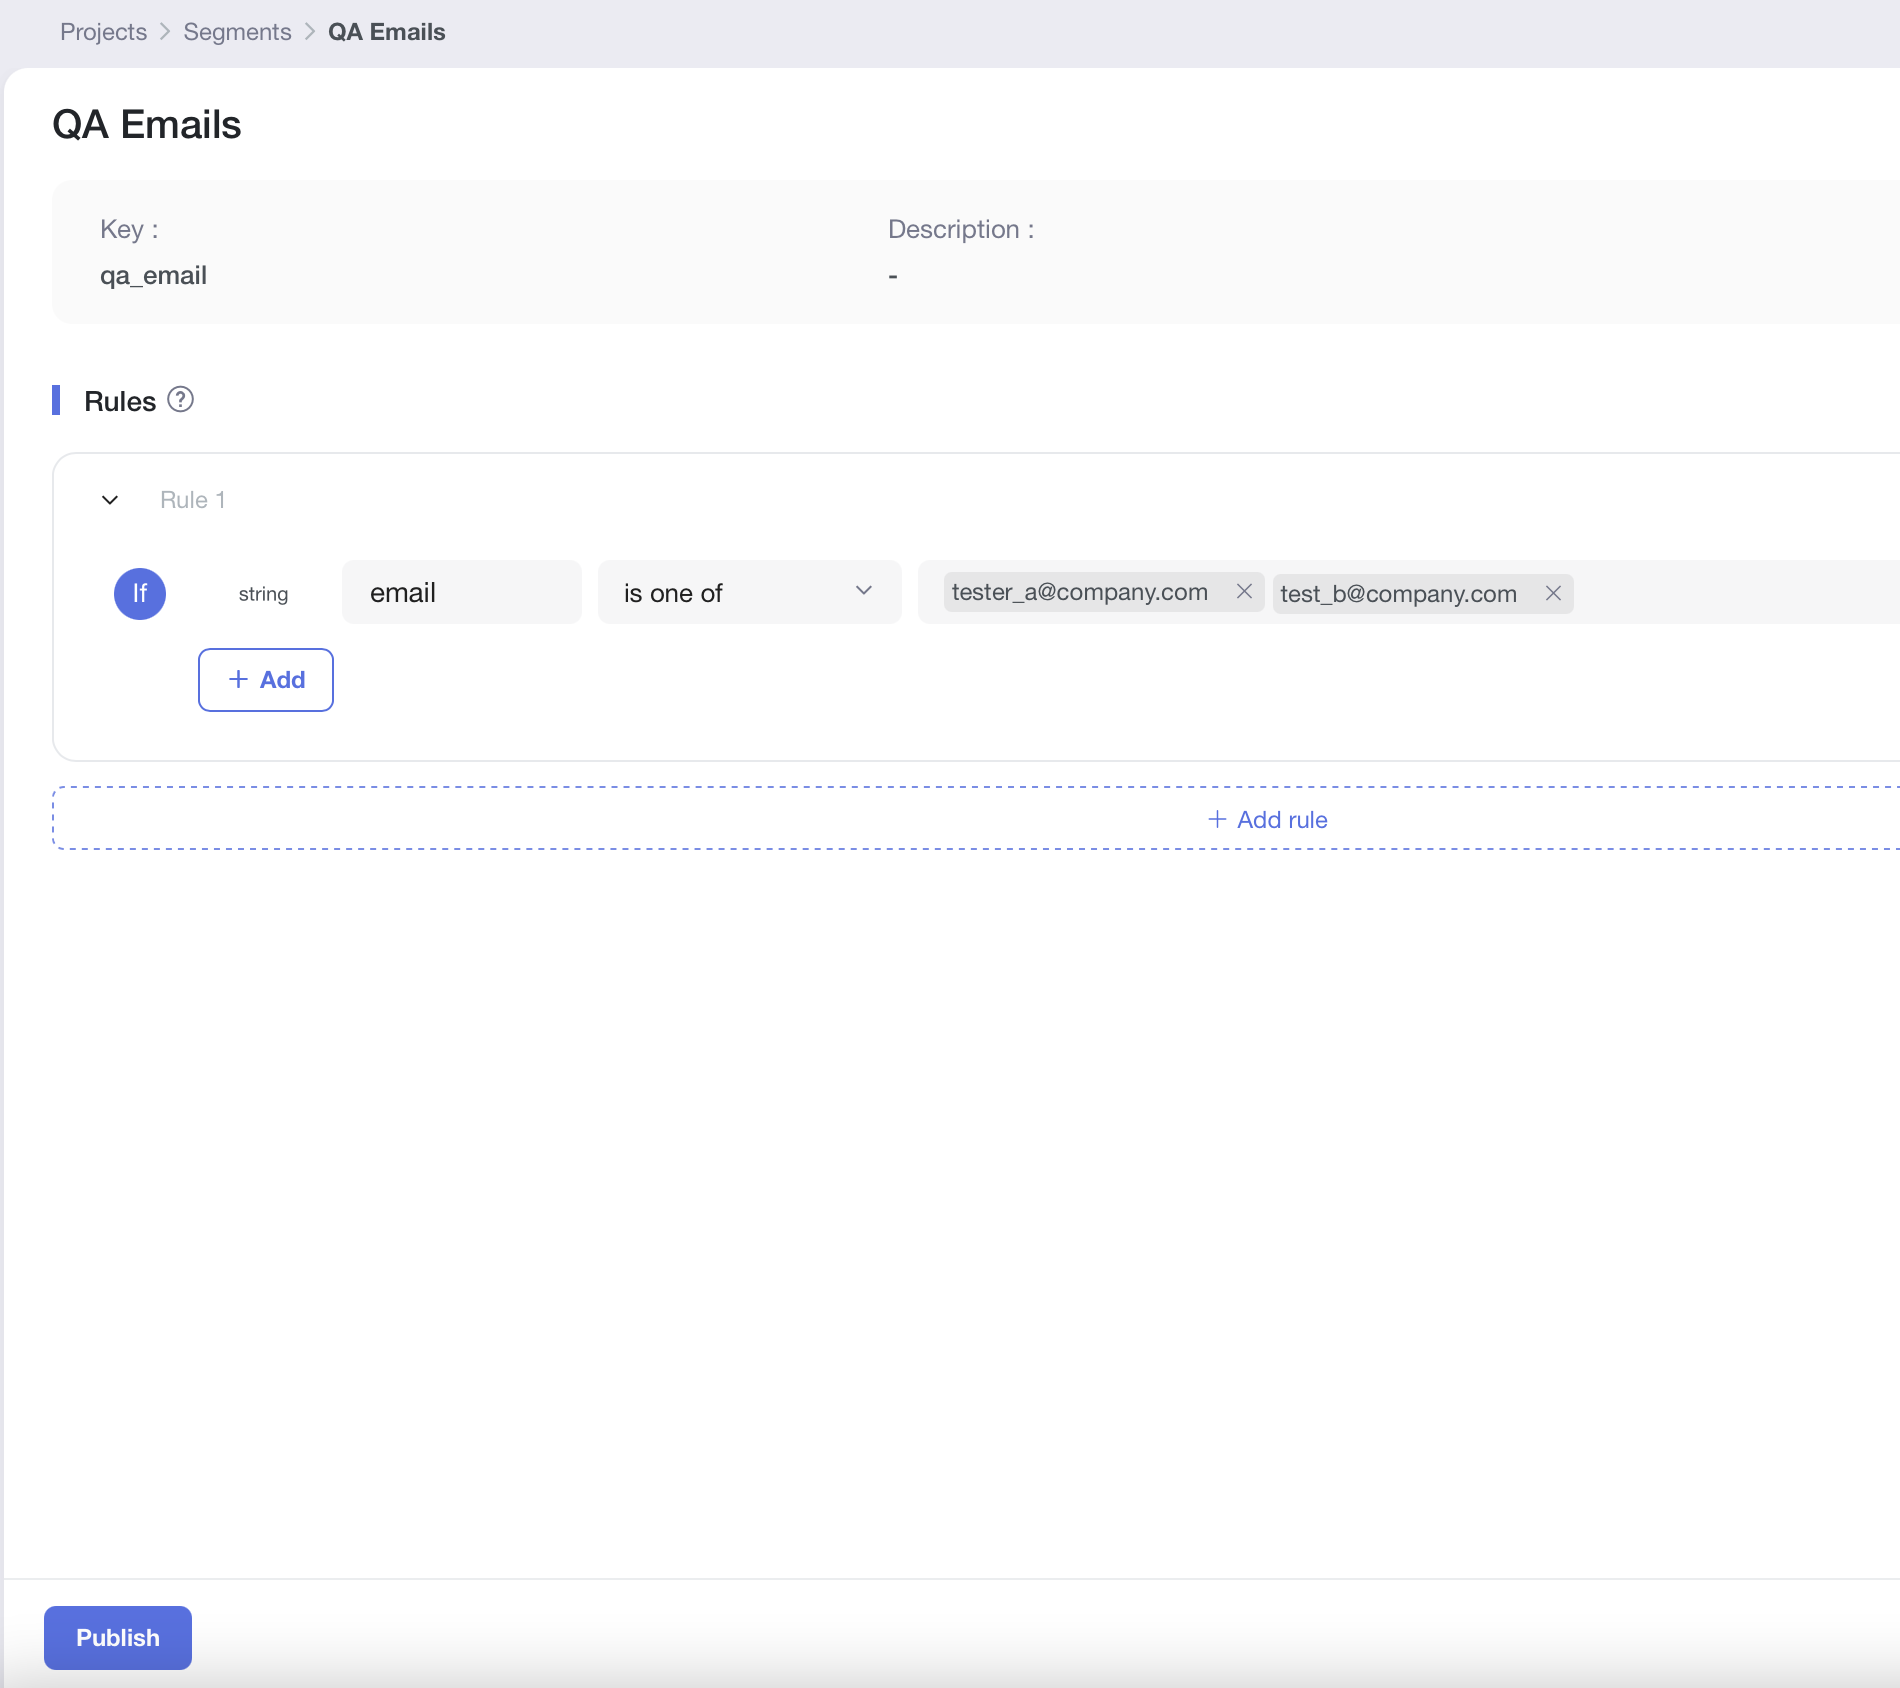
- Add a rule, select the type, enter the attribute
email,
- Select
stringtype - Select
is one ofoperator - Then enter the emails of the two QAs
- Click
Publish
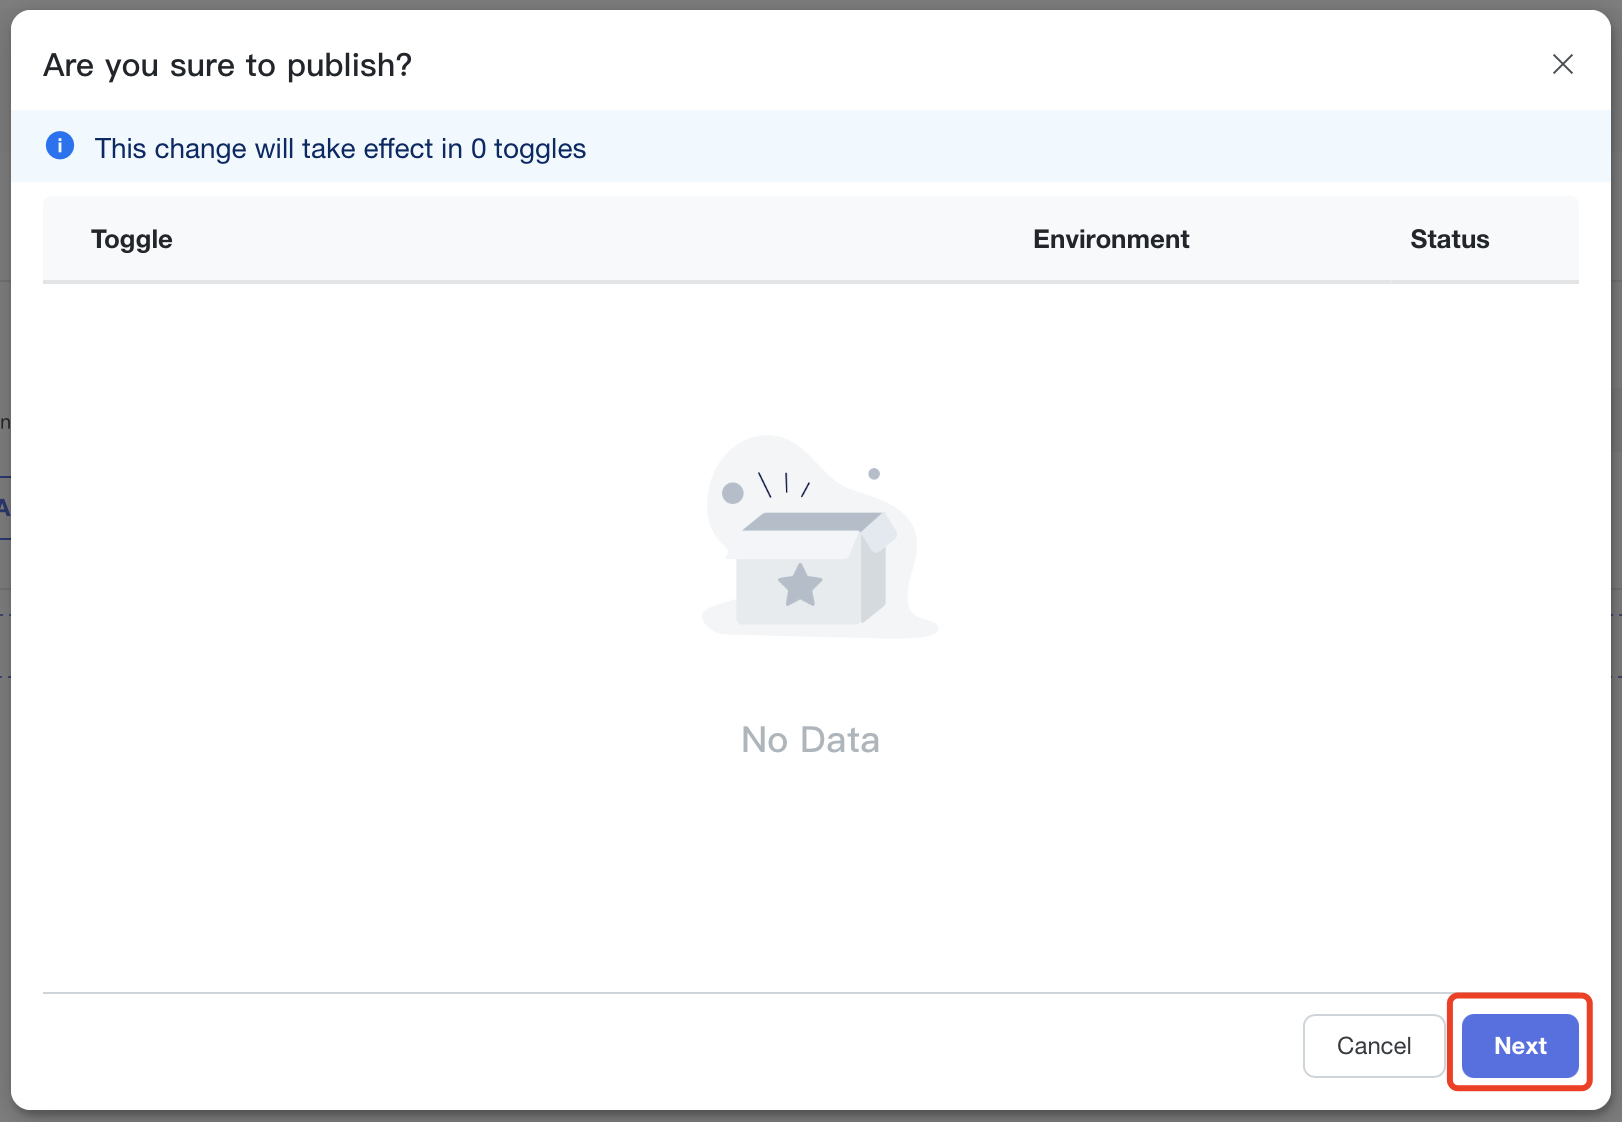
- There is no toggle to use this "segment", click "next" and "confirm" to change.
Use segment in toggle
Next, we come to Toggles list, create two toggles using the segment qa_email created above.
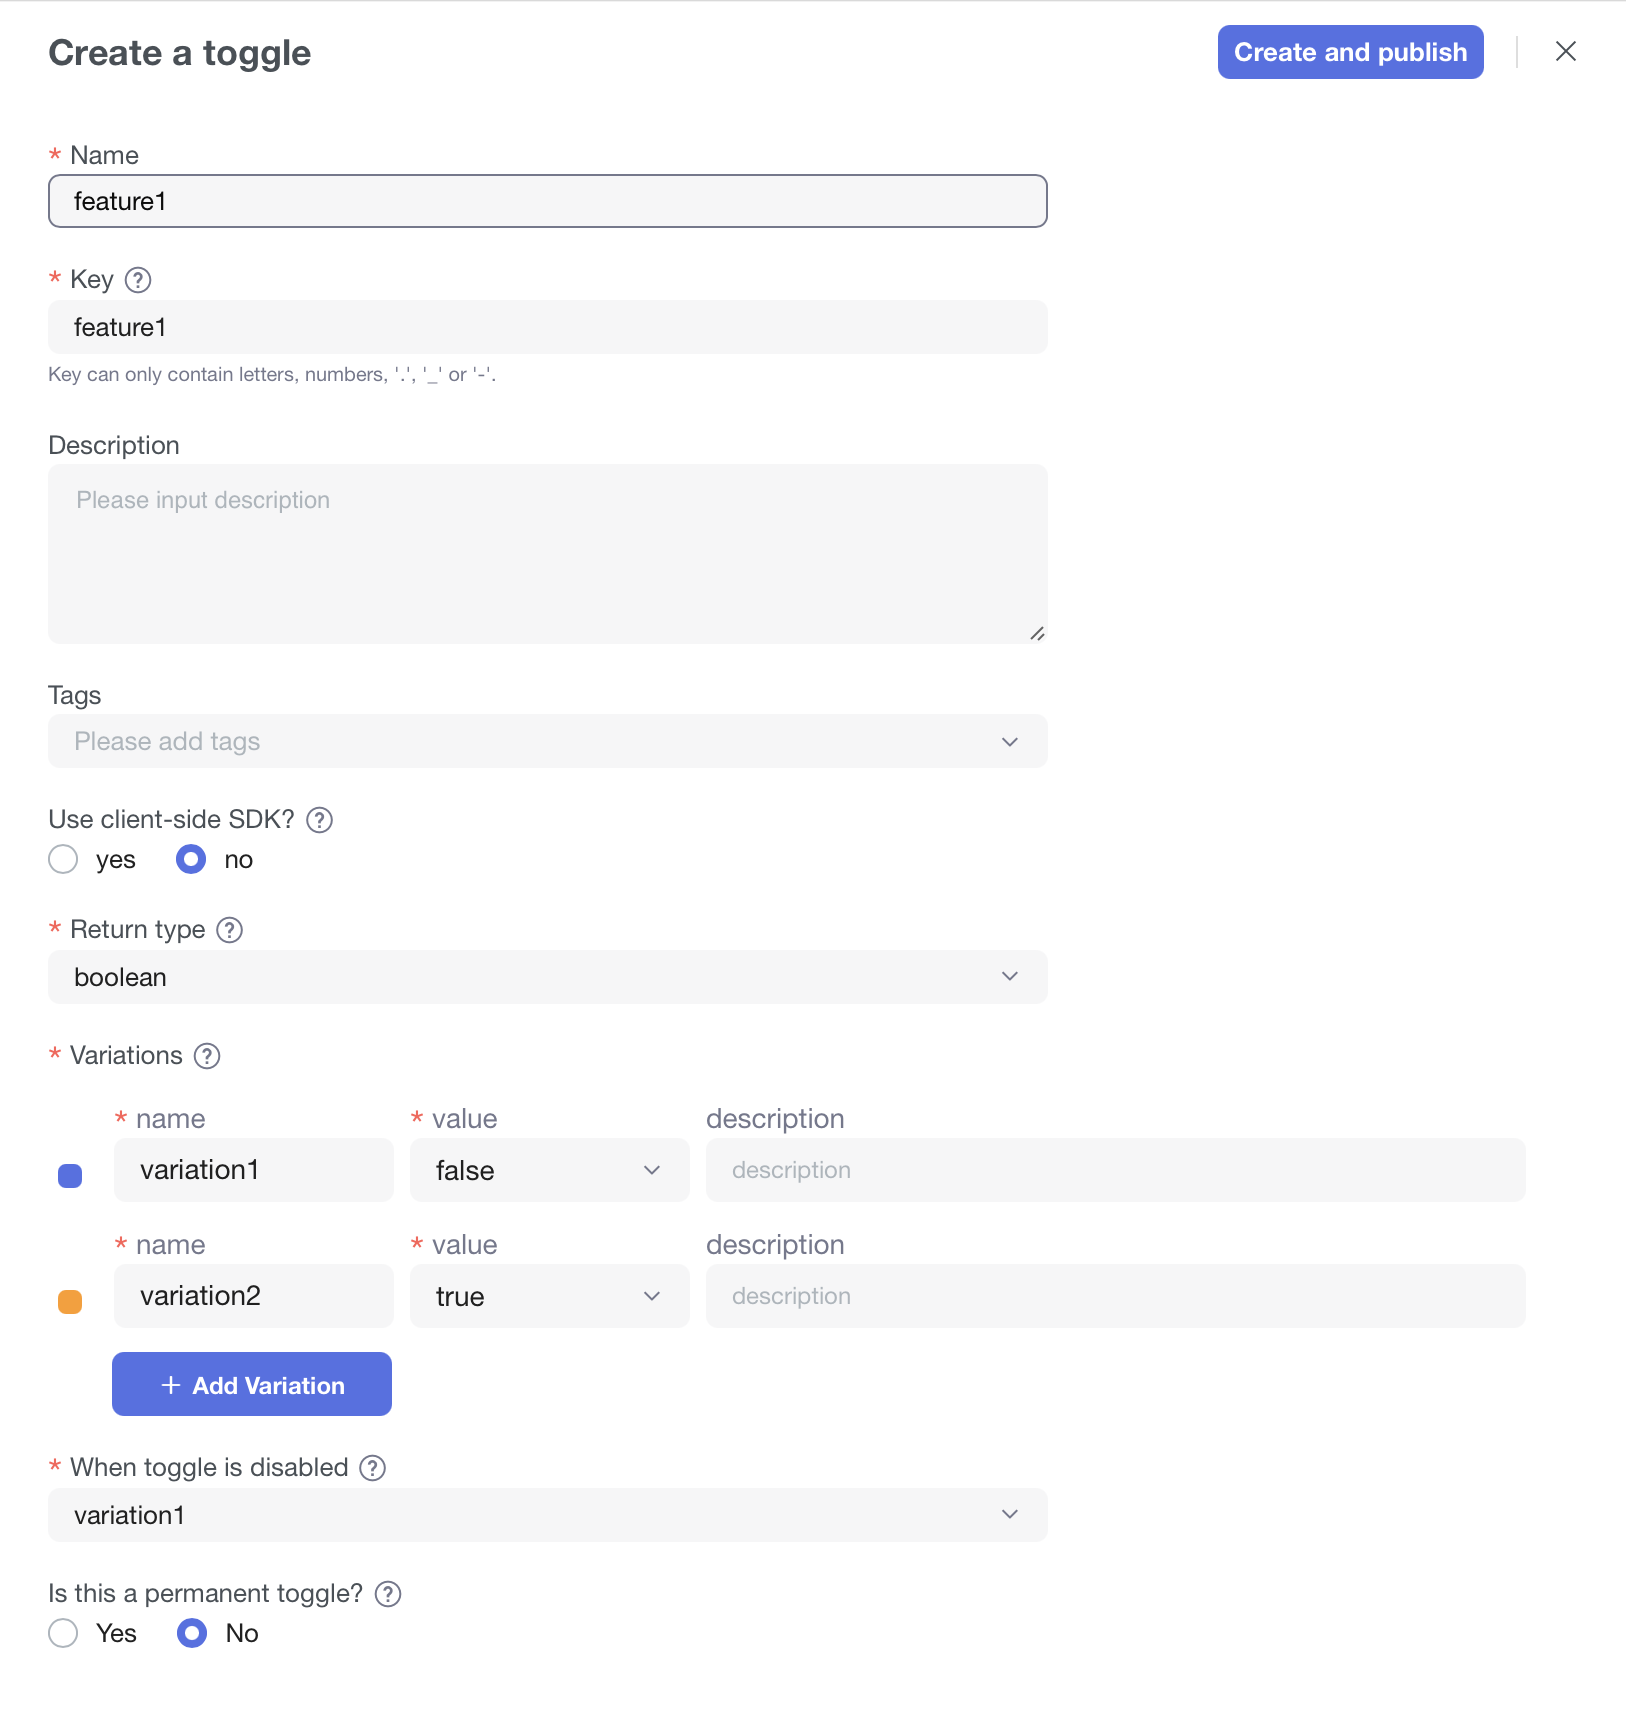
- Create a toggle
feature1with a return variation value of boolean type, use the default configuration, and then clickCreate and publish.
- Enter the targeting page of the toggle
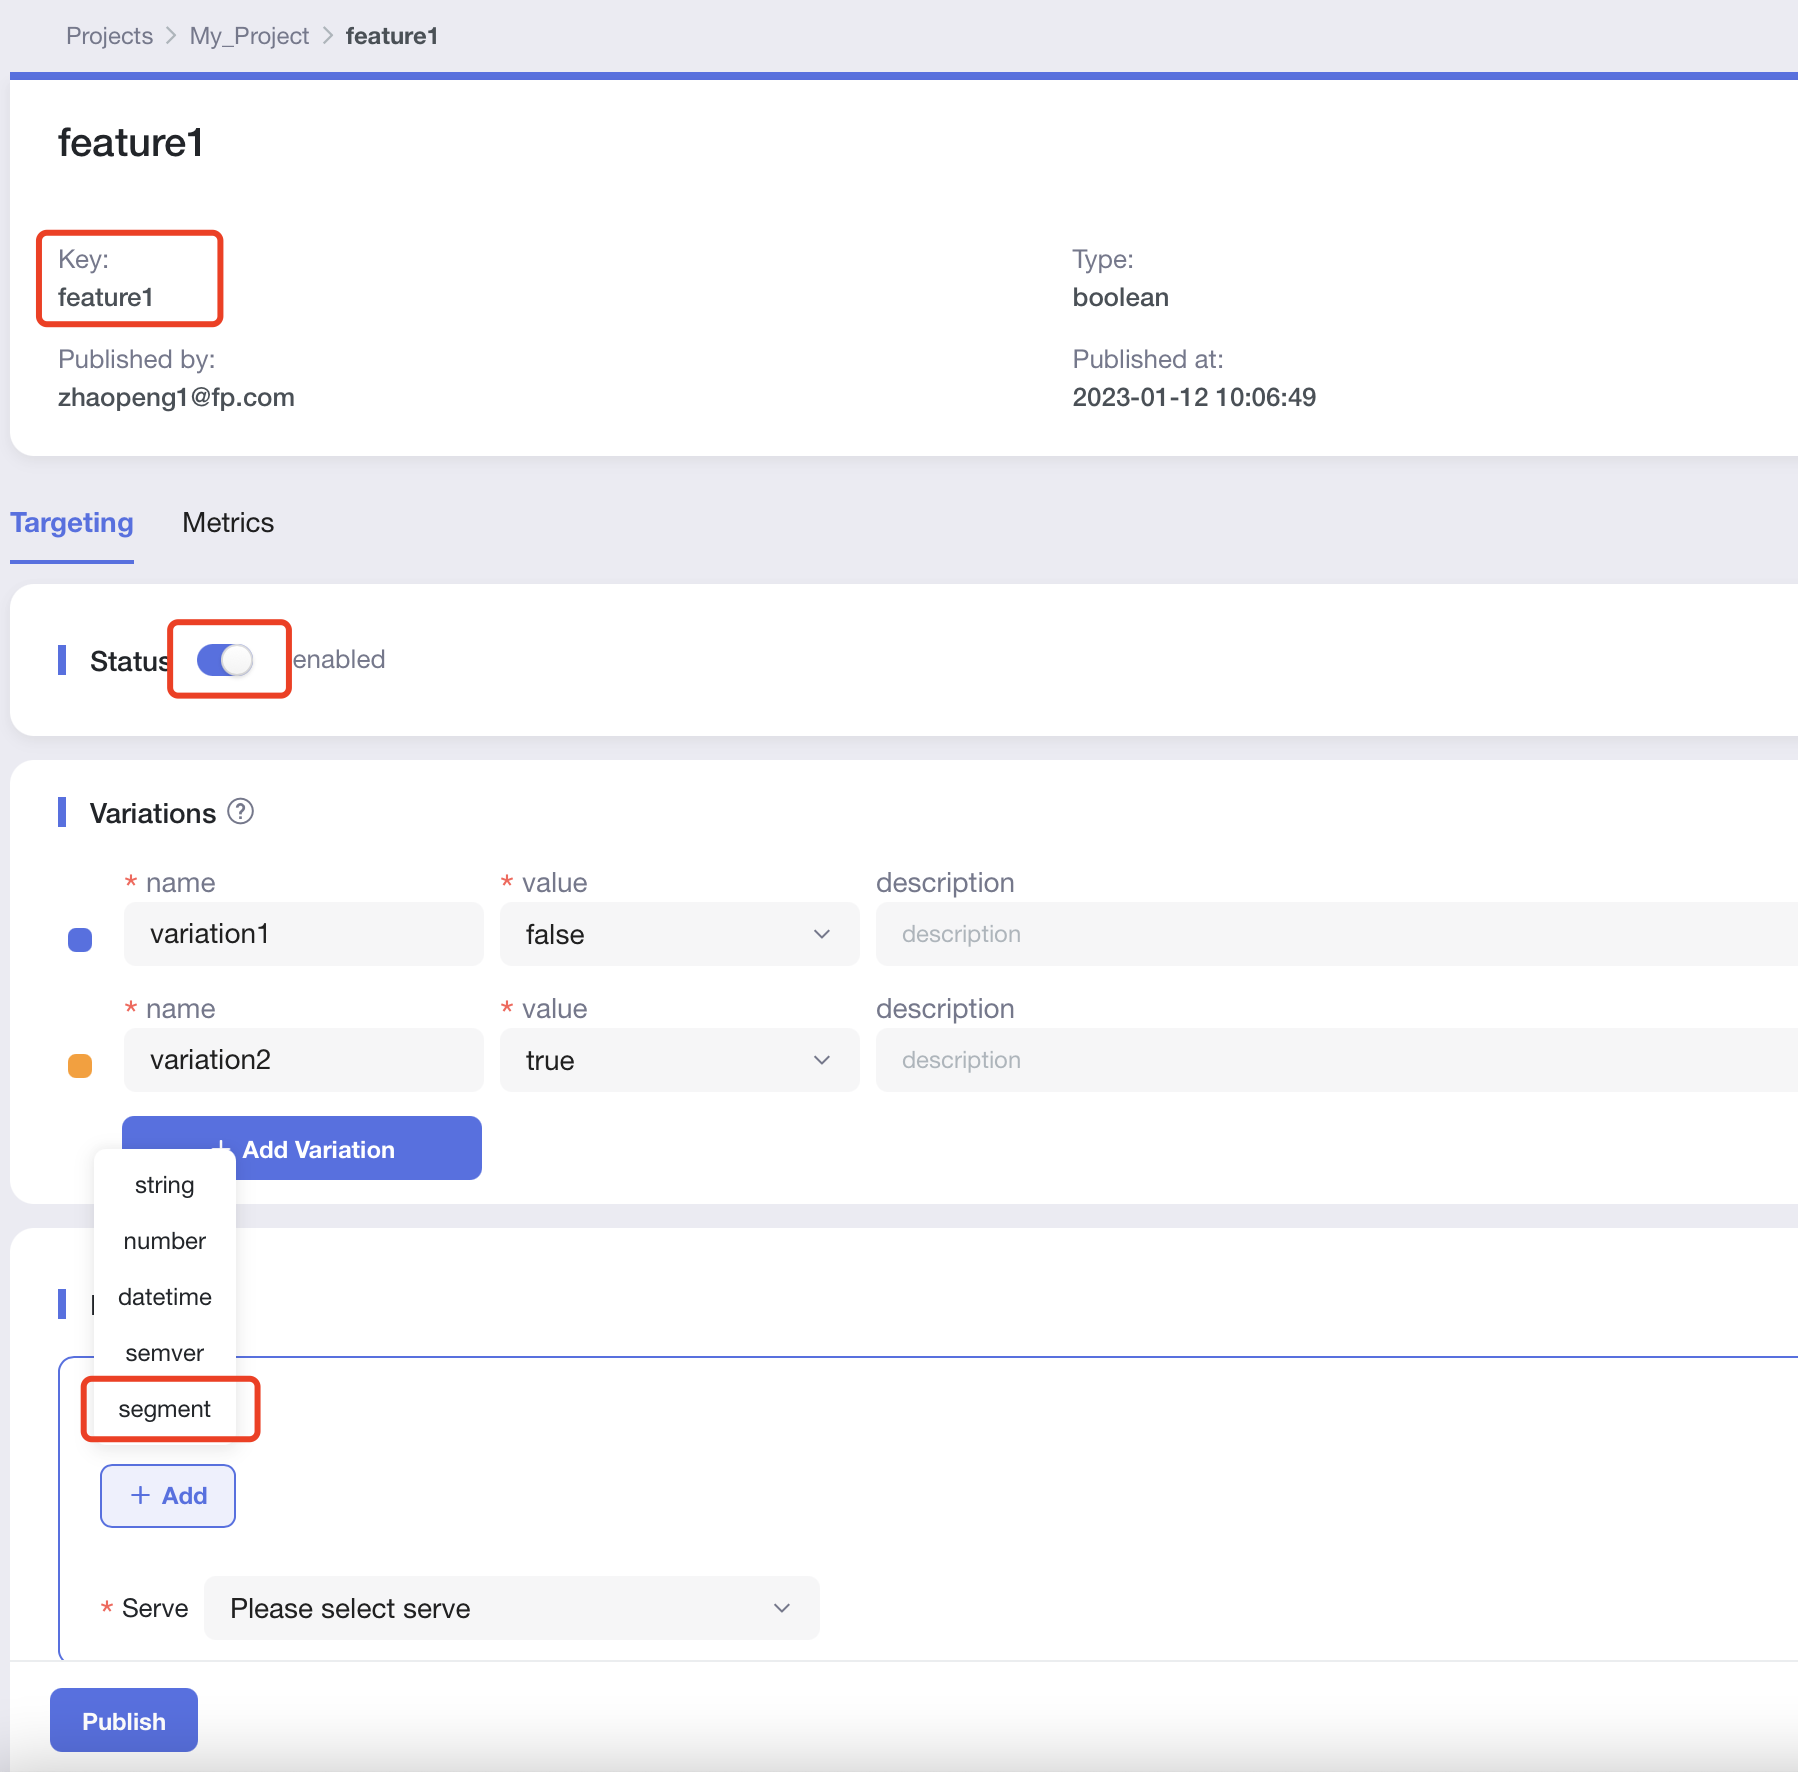
feature1, change the status toenabled, click+ Add Rule, and select thesegmenttype.
- Edit rules
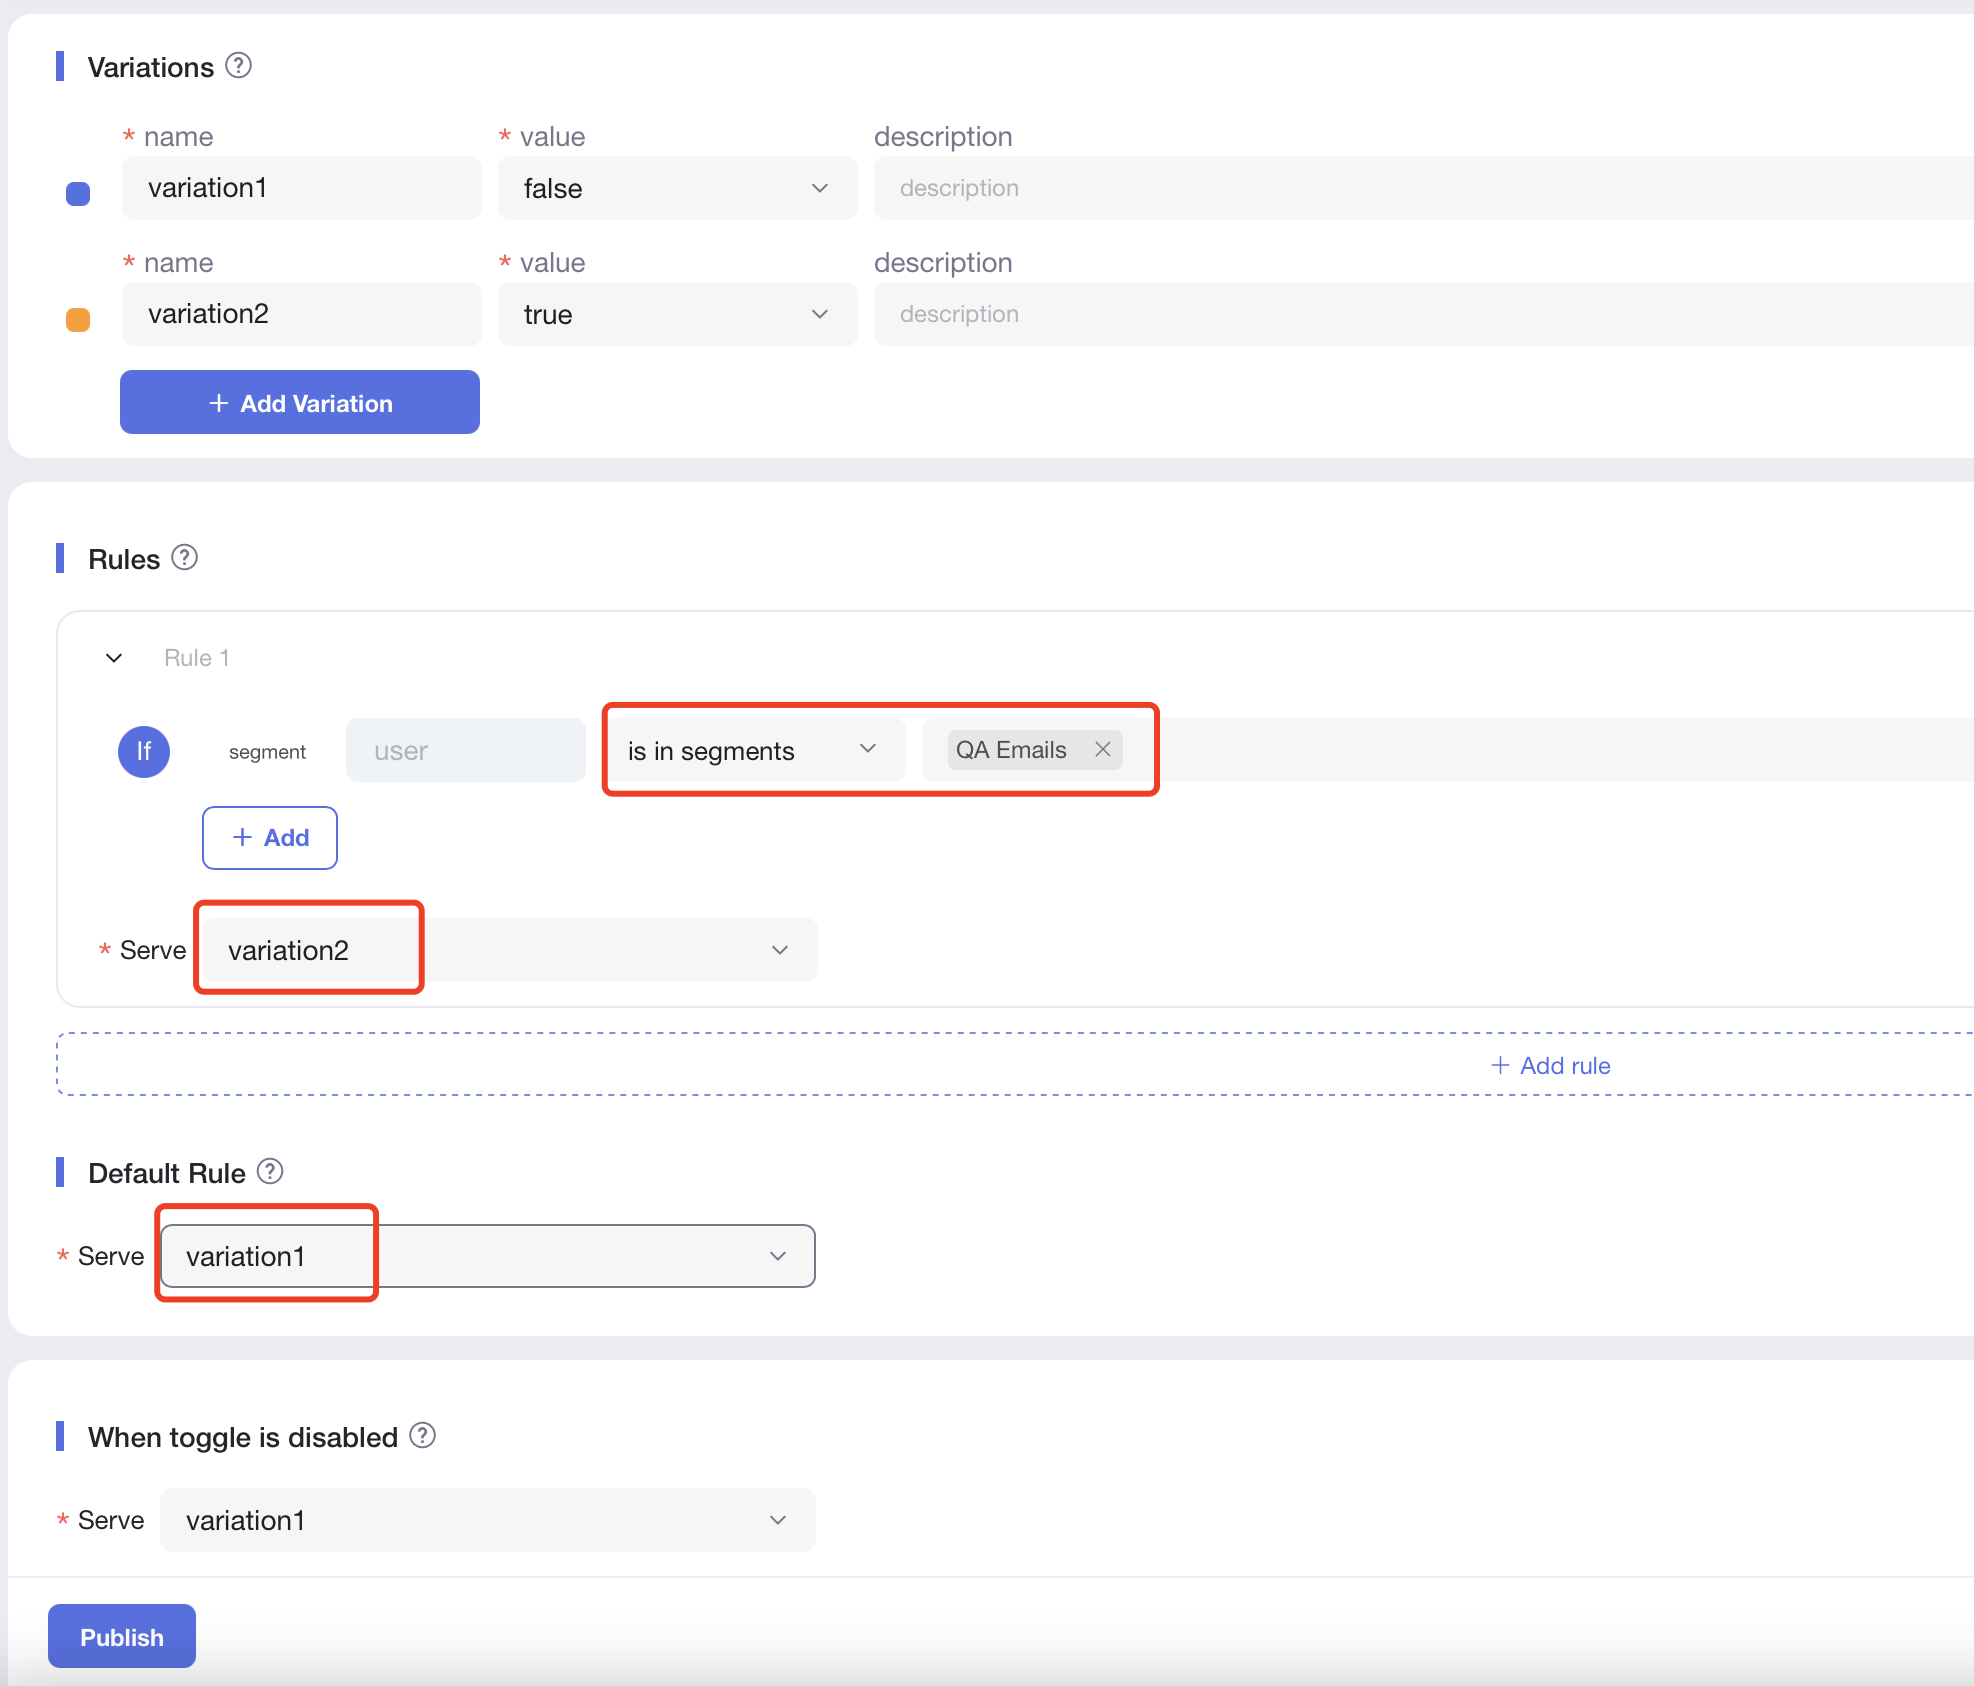
- Select
is in segments - Select the
QA Emailsegment - Set the return variation value
variation2for the segment - Other return rules set the return variation value
variation1
- Publish toggle
feature1. - Repeat steps 1-4 above to create another toggle
feature2using the same segment.
Validate segment
Backend code writing
- According to the language you are familiar with, download and open the corresponding back-end sample code.
- Java
- Go
- Rust
- Python
- Node.js
git clone https://github.com/FeatureProbe/server-sdk-java.git
cd server-sdk-java
Open src/main/java/com/featureprobe/sdk/example/FeatureProbeDemo.java file with an editor.
git clone https://github.com/FeatureProbe/server-sdk-go.git
cd server-sdk-go
Open example/main.go file with an editor.
git clone https://github.com/FeatureProbe/server-sdk-rust.git
cd server-sdk-rust
Open examples/demo.rs file with an editor.
git clone https://github.com/FeatureProbe/server-sdk-python.git
cd server-sdk-python
Open demo.py file with an editor.
git clone https://github.com/FeatureProbe/server-sdk-node.git
cd server-sdk-node
Open example/demo.js file with an editor.
- Open the FeatureProbe platform project list page, you can click
Projectson the toggle details page to open
- Copy
Server SDK Key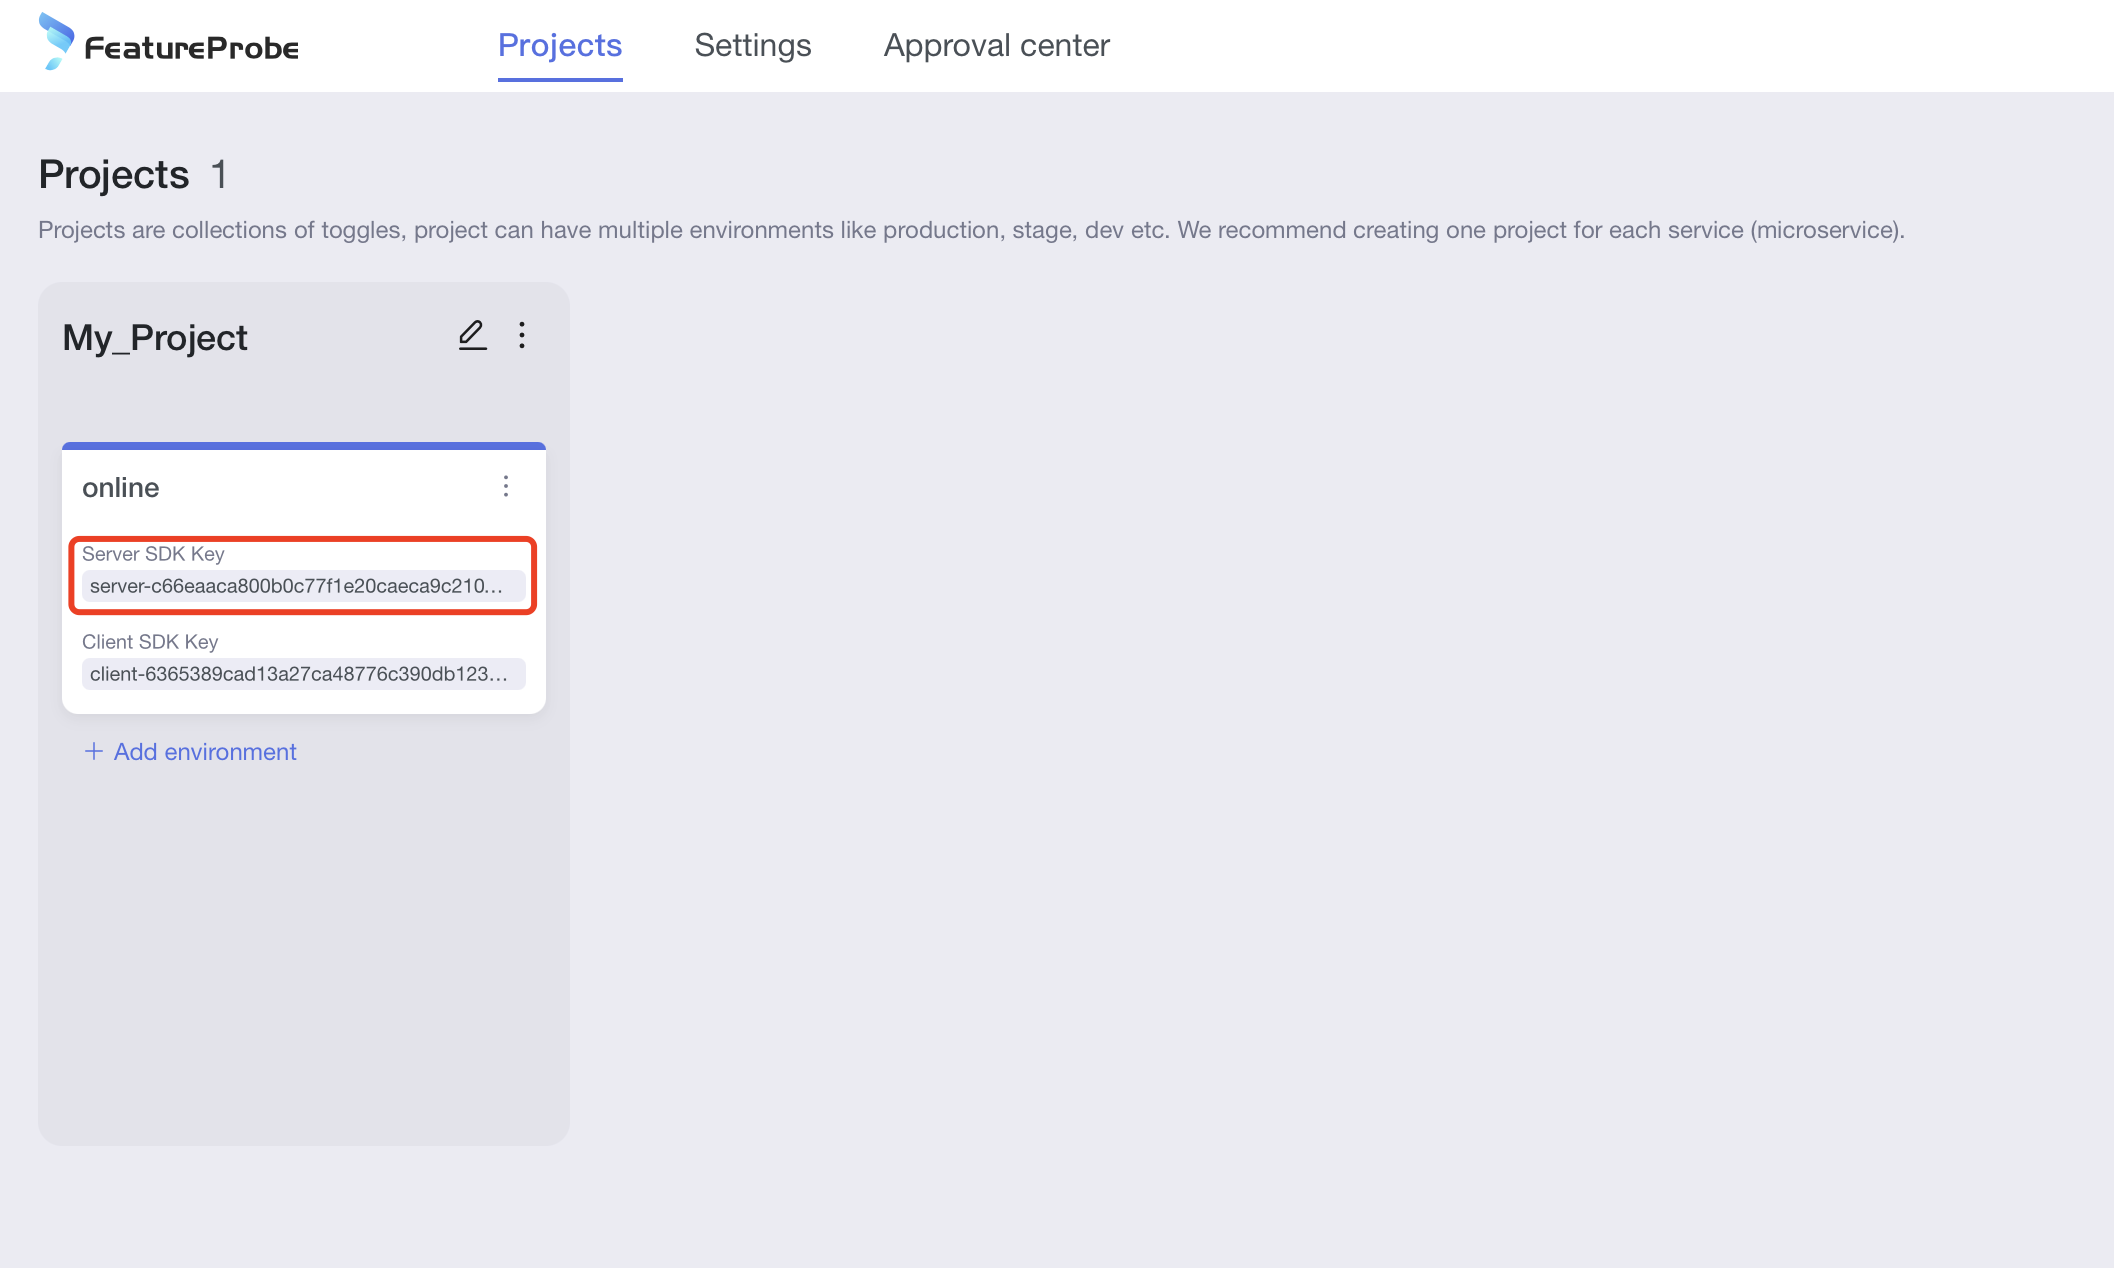
- Fill in
Server SDK KeyandFeatureProbe remote URL("https://featureprobe.io/server") into the corresponding variables of the backend code
- Java
- Go
- Rust
- Python
- Node.js
private static final String FEATURE_PROBE_SERVER_URL = "https://featureprobe.io/server";
private static final String FEATURE_PROBE_SERVER_SDK_KEY = // 填入 服务端SDK密钥 ;
config := featureprobe.FPConfig{
    RemoteUrl: "https://featureprobe.io/server",
    ServerSdkKey:    // 填入 服务端SDK密钥
    RefreshInterval: 5000, // ms
    WaitFirstResp:   true,
}
let remote_url = "https://featureprobe.io/server";
let server_sdk_key = // 填入 服务端SDK密钥
FEATURE_PROBE_SERVER_URL = 'https://featureprobe.io/server'
FEATURE_PROBE_SERVER_SDK_KEY = # 填入 服务端SDK密钥
const FEATURE_PROBE_SERVER_URL = 'https://featureprobe.io/server';
const FEATURE_PROBE_SERVER_SDK_KEY = // Fill in the server SDK key
- Add the following code to simulate three users with email attributes accessing these 2 toggles.
- Java
- Go
- Rust
- Python
- Node.js
public static void main(String[] args) throws IOException {

     Logger root = (Logger)LoggerFactory.getLogger(org.slf4j.Logger.ROOT_LOGGER_NAME);
     root.setLevel(Level.WARN);

     final FPConfig config = FPConfig.builder()
     .remoteUri(FEATURE_PROBE_SERVER_URL)
     .build();

      // Init FeatureProbe, share this FeatureProbe instance in your project.
      final FeatureProbe fpClient = new FeatureProbe(FEATURE_PROBE_SERVER_SDK_KEY, config);

      FPUser[] users = {
         new FPUser().with("email", "tester_a@company.com"),
         new FPUser().with("email", "tester_b@company.com"),
         new FPUser().with("email", "tester_c@company.com"),
      };

      for (FPUser user:users) {
         if (fpClient.boolValue("feature1", user, false)) {
            System.out.println(user.getAttr("email") + " see the new feature1");
         } else {
            System.out.println(user.getAttr("email") + " see nothing");
         }
      }

      for (FPUser user:users) {
         if (fpClient.boolValue("feature2", user, false)) {
            System.out.println(user.getAttr("email") + " see the new feature2");
         } else {
            System.out.println(user.getAttr("email") + " see nothing");
         }
      }

      fpClient.close();
}
func main() {
    config := featureprobe.FPConfig{
        RemoteUrl: "https://featureprobe.io/server",
        ServerSdkKey:    // Fill in the server SDK key,
        RefreshInterval: 5000, // ms
        WaitFirstResp:   true,
    }
    fp, err := featureprobe.NewFeatureProbe(config)
    if err != nil {
        fmt.Println(err)
        return
    }
    users := []featureprobe.FPUser{
        featureprobe.NewUser().With("email", "tester_a@company.com"),
        featureprobe.NewUser().With("email", "tester_b@company.com"),
        featureprobe.NewUser().With("email", "tester_c@company.com"),
    }

    for _, user := range users {
        if (fp.BoolValue("feature1", user, false)) {
            fmt.Println(user.Get("email"), "see the new feature1")
        } else {
            fmt.Println(user.Get("email"), "see nothing")
        }
    }

    for _, user := range users {
        if (fp.BoolValue("feature2", user, false)) {
            fmt.Println(user.Get("email"), "see the new feature2")
        } else {
            fmt.Println(user.Get("email"), "see nothing")
        }
    }
    fp.Close()
}
#[tokio::main]
async fn main() {
    let remote_url = "https://featureprobe.io/server";
    let server_sdk_key = // Fill in the server SDK key
    let config = FPConfig {
        remote_url: remote_url.to_owned(),
        server_sdk_key: server_sdk_key.to_owned(),
        refresh_interval: Duration::from_millis(2000),
        ..Default::default()
    };

    let fp = match FeatureProbe::new(config) {
        Ok(fp) => fp,
        Err(e) => {
            tracing::error!("{:?}", e);
            return;
        }
    };
    let users = [
        FPUser::new().with("email", "tester_a@company.com"),
        FPUser::new().with("email", "tester_b@company.com"),
        FPUser::new().with("email", "tester_c@company.com")
    ];
    for user in users {
        if fp.bool_value("feature1", &user, false) {
           println!("{:?} see the new feature1", user.get("email"));
        } else {
           println!("{:?} see nothing", user.get("email"));
        }
    }
    for user in users {
        if fp.bool_value("feature2", &user, false) {
            println!("{:?} see the new feature2", user.get("email"));
        } else {
            println!("{:?} see nothing", user.get("email"));
        }
    }
    fp.close();
}
logging.basicConfig(level=logging.WARNING)

if __name__ == '__main__':
    FEATURE_PROBE_SERVER_URL = 'https://featureprobe.io/server'
    FEATURE_PROBE_SERVER_SDK_KEY = # Fill in the server SDK key

    config = fp.Config(remote_uri=FEATURE_PROBE_SERVER_URL,  # FeatureProbe server URL
                       sync_mode='polling',
                       refresh_interval=3)

    with fp.Client(FEATURE_PROBE_SERVER_SDK_KEY, config) as client:
        users = [
            fp.User().with_attr("email", "tester_a@company.com"),
            fp.User().with_attr("email", "tester_b@company.com"),
            fp.User().with_attr("email", "tester_c@company.com")
        ]

        for user in users:
            if client.value('feature1', user, default=False):
                print(user['email'] + 'see the new feature1')
            else:
                print(user['email'] + 'see nothing')

        for user in users:
            if client.value('feature2', user, default=False):
                print(user['email'] + 'see the new feature2')
            else:
                print(user['email'] + 'see nothing')
const fpClient = new featureProbe.FeatureProbe({
  remoteUrl: FEATURE_PROBE_SERVER_URL,
  serverSdkKey: FEATURE_PROBE_SERVER_SDK_KEY,
  refreshInterval: 5000,
});

const users = [
    new featureProbe.FPUser().with("email", "tester_a@company.com"),
    new featureProbe.FPUser().with("email", "tester_b@company.com"),
    new featureProbe.FPUser().with("email", "tester_c@company.com"),
];

for(let i = 0; i < users.length; i++) {
  if (fpClient.booleanValue("feature1", users[i], false)) {
    console.log(users[i].get("email") + ' see the new feature1');
  } else {
    console.log(users[i].get("email") + ' see nothing');
  }
}

for(let i = 0; i < users.length; i++) {
  if (fpClient.booleanValue("feature2", users[i], false)) {
    console.log(users[i].get("email") + ' see the new feature2');
  } else {
    console.log(users[i].get("email") + ' see nothing');
  }
}
In addition to the user attributes explicitly used in the rules of toggle, which need to be passed to the SDK through the with method, the user attributes (for example: email) that need to be used in the segment used in toggle also need to be passed to the FeatureProbe SDK through the with method.
Run the code
Run the program.
- Java
- Go
- Rust
- Python
- Node.js
mvn package
java -jar ./target/server-sdk-java-1.4.0.jar
go run example/main.go
cargo run --example demo
pip3 install -r requirements.txt
python3 demo.py
node example/demo.js
Check the log verification results, you can see that the two test emails (tester_a and tester_b) in the segment can see the two new features, but the email (tester_c) not in the segment cannot see them.
tester_a@company.com see the new feature1
tester_b@company.com see the new feature1
tester_c@company.com see nothing
tester_a@company.com see the new feature2
tester_b@company.com see the new feature2
tester_c@company.com see nothing
Update segment
Next, let's update the rules of the segment, and then verify that the updated results can take effect on the two toggles at the same time.
Update segments on the page
- Enter the edit page of the segment
qa_email. - Delete email account
test_band add email accounttest_c.

- Publish segment.
Rerun the program to see the result
Run the program again according to the above operation method to view the log
tester_a@company.com see the new feature1
tester_b@company.com see nothing
tester_c@company.com see the new feature1
tester_a@company.com see the new feature2
tester_b@company.com see nothing
tester_c@company.com see the new feature2
You can see that the modification has taken effect on both toggles.