How to use project and environment
Project Management
Projects allow one FeatureProbe account to manage multiple different business goals. Generally a project corresponds to a system platform. For example, you can create a project called "Mobile Application" and another project called "Server Application". Each project has its own unique environment and corresponding functional toggles. You can create multiple environments in each project, all projects must have at least one environment The system will have an initial project (My First Project) with 2 environments (test, online) each with its own SDK key to connect the FeatureProbe SDK to the specific environment.
Add project
- Click "Projects" in the top menu to enter the project list page
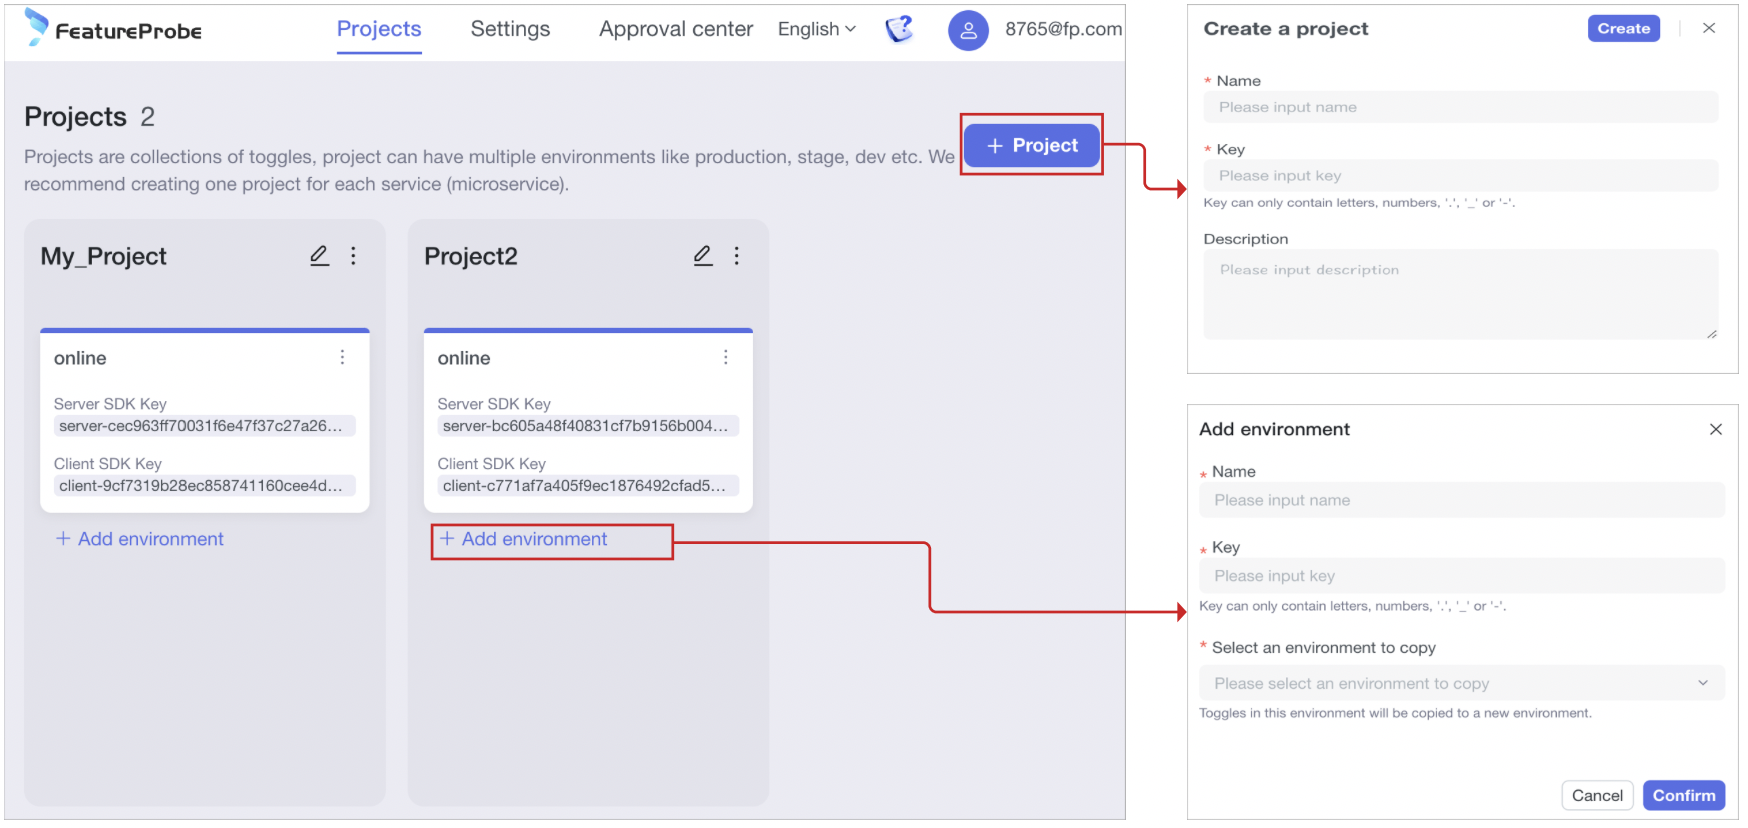
- Click the Add Project button
- fill in the project name
- fill in the key (the project's unique identifier, once created, cannot be edited)
- Fill in the description
- Click the Create button to complete the creation of the project (once the project is created, it cannot be deleted. The newly created project will come with an online environment)
- Click the environment card under the project to go directly to the list of toggles for that environment under the project
Adding an environment
- Click Add Environment
- Fill in the environment name
- fill in the key (the unique identifier of the environment, unique under the same project, once created, cannot be edited)
- Select an environment to copy (optional range: all existing environments under this project), and all toggles information of this environment will be copied to the new environment. (Toggle latest configuration content,toggle status, etc.)
- click the Create button to complete the creation of the environment (once the environment is created, it cannot be deleted)
- Note: After the new environment is created, it will share the list of toggles under the project (the template information of the toggles), and the configuration information of the toggles will need to be configured independently by entering the environment.
Edit project
- Click Edit Project Icon
- Edit the project information
- Click the Save button to finish editing the project
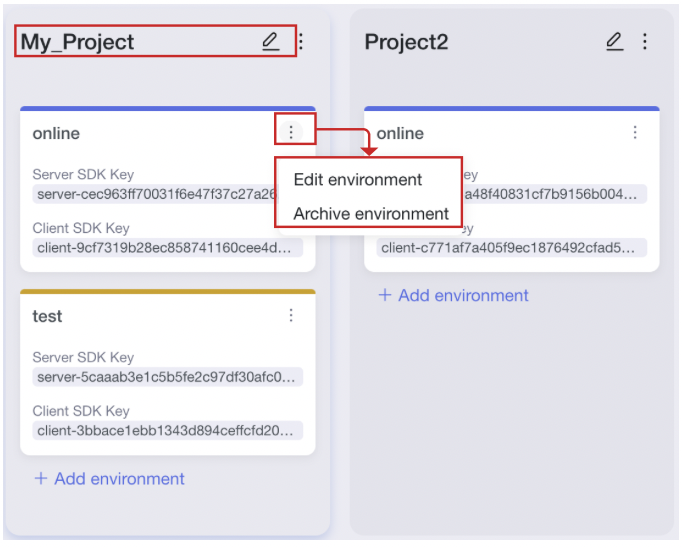
Edit environment
- Click Edit Environment
- Only supports editing the environment name
- Click the Save button to finish editing the environment
Offline and recovery environment
! archived environment screenshot
Archive environment:
- Click "Archive environment" to offline environment at any time. After Archived,it cannot be edited,and the platform will not display the toggle configuration information corresponding to this environment (the toggle list page cannot be switched to this environment)
- When there is only one environment under the project, the environment cannot be Archived (if you want to Archive the last environment, you can directly delete the project)
- Click "View Archived environments" to see the Archived environments of the project (click the Archived environment card to not enter the toggle list page), and click "View active environments" to return to the online environment of the project
Restore oenvironment:
- Click "Restore environment" to restore the environment to online. After restoration, restore all toggles and toggle configurations in the environment (if some toggles are Archived, the Archived toggles and configurations will not be restored)
Delete Item
- Click "Delete Item" to delete the item (Note: the item can only be deleted after all switches are offline);
- After the item is deleted, it will disappear from the item list (unrecoverable);